


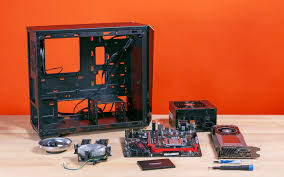
How to Disassemble and Assemble PC
Steps/ Procedure:
1. Confirm that the hardware works…
– Does your video monitor work?
Does your PC boot?
Do your floppy drive and CD/DVD drive work?
Does the hard drive work?
Do the keyboard and mouse functioning?
2. Turn OFF the system.
NOTE : read this entirety before you begin
1. Discharge yourself of all static electricity by touching the PC’s chassis (or the ground screw on the receptacle.)
2. Safety NOTE!! Beware of sharp edges!!! The cheaper chassis have very sharp edges that can cut you easily. Be very careful and take your time. Remember,
SAFETY FIRST.
3. As you remove each board and disk drive, document the information listed in the attached Specifications document (note some parts of the spec sheets won’t apply to this lab).
3. Disassemble the Unit
Remove the External I/O Systems:
1. Unplug all power cords, from the commercial outlet
2. Remove all peripherals from the system unit.
3. Disconnect the keyboard from the rear of the unit.
4. Disconnect the monitor power cable.
5. Disconnect the monitor signal cable (video cable) from the video adapter card.
Do the following for each card and drive removed:
• Before removing a card, document any cables that are attached to the card, noting where they go and their orientation.
• Store screws properly.
• Note the position of the colour strip (pin no. 1) on the cables and make a mark for the pin no.1 if needed on the I/O card or Motherboard and on the Floppy and the hard drive.
Remove the Storage Devices in the System Unit:
6. Remove the floppy drive.
7. Remove the hard drive.
Remove the Interface Cards (Adapter Cards):
8. Remove the video card from the expansion slot.
9. Remove other interface cards if exists.
• draw a picture of the card. The drawing should accurately show–>
• the shape of the board,
• the connectors on the board, including the card edge connector,
• the number of pins on connectors,
• all jumpers and the jumper settings.
• label the board with any identification that appears on the card (chip
sets or manufacturer stamps, BIOS stamps, etc…).
4. Assemble the PC
– To assemble the PC, reverse the procedure above or follow the procedures in the Assembling Computer System.
We can write this or a similar paper for you! Simply fill the order form!